
The Guide to Crafting The Perfect Web Push Notification
Web push notifications are the next marketing medium to watch out for. Endless promotions are sent every day, so it’s vital to ensure that your marketing is unobtrusive yet catchy enough that it sticks with your consumer. Highly visible and quick to read- web push notifications are exactly what you need.

However, push notifications are a new marketing platform. This means that users are still figuring out the best ways to make push notifications more engaging- from copy length to CTAs. By following a few golden rules, you can ensure that your notifications garner more attention than usual. You don’t have to spend much time looking for these rules though because we’ve done the research for you.
Let’s see what goes into crafting the perfect web push notification:
5 Elements To Craft The Perfect Web Push Notification
1. Crafting Copy
Web push notifications allow just 25 to 48 characters for the copy. this means that every word needs to be well thought out. Here's how you can go about figuring out how to write your copy:
- Understand what your brand should sound like. This means figuring out what your tone is, whether it's exciting, nurturing, or conversational.
- Pinpoint what you want to convey from your promotions. You may have a new product out or a discount running on your store. View the different types of web push campaigns you can send.
- While writing the copy, be careful to keep your title and message short. Each device— Windows, Mac, and Android— has a different copy length and it’s important to ensure that the message is not cut off for any of your subscribers.
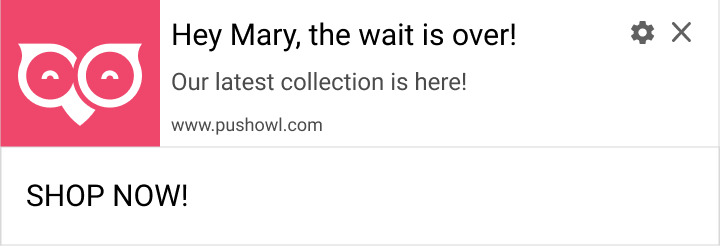
Here's how an unoptimized notification title looks like:

Not sure what the notification copy lengths are? This guide about Push Notification Length Best Practices has all the details on the ideal copy length for every device and browser.
2. Timing and Frequency
How your push notification performs also depends on when you send your campaign. For instance, sending a push notification during the weekend may not work if you have more desktop subscribers because they might be away from their desktop or too busy to look at it. This is especially worse if you’re running a weekend sale because your subscribers might end up receiving an expired offer.
Ensure your timing and frequency is ideal with these two tips:
1. Use the Smart Delivery feature to ensure your notifications get the right kind of attention. Smart Delivery breaks down your campaign delivery over a 24 hour period and sends out the notification to each subscriber when they are most active on their device. So, even if you’ve sent your notification at 12pm in your time zone, you won't have to worry about missing your subscribers on the other side of the globe. Read more about how Smart Delivery works and how you can set it up.
2. Figure out the optimal frequency for your store. Even with Smart Delivery, you need to be careful about not spamming your subscribers with too many notifications. That doesn’t mean you should send just one notification a month. You don’t want your subscribers to forget about you either! Read this guide to find the optimal frequency for your push notification strategy to understand how many notifications you should send based on your industry and product type.
BONUS: If you’ve connected your PushOwl account to Google Analytics, you can understand which day and time work best for your campaigns. Read about setting up a PushOwl dashboard on Google Analytics.
3. Hero Images
Images are proven to entice customers better than text. One research proved that people follow visual instructions 323% better than written instructions. So, it’s a must to take advantage of the hero image feature when creating your push notification.
Not sure how to best use hero images in your push notifications? Here are a few things you must keep in mind while designing your hero images:
1. Design two sizes to optimize your hero image. These are the recommended sizes for hero images in your push notification:
i) Desktop: 728px (W) x 360px (H)
ii) Mobile: 720px (W) x 240px (H)
2. Keep the copy in your hero image short and catchy. Your subscribers are not likely to read long texts in images. Instead, focus on picking an appealing image that tells the story better.
3. Use images of your products. It’s more important to show your product. Consumers are likely to be persuaded by a great product image than a loud poster with illustrations.

4. Create a fun poster for a time-sensitive sale. Use the hero image to emphasize the discount amount for your sale and how long it’ll run for.

Disclaimer: While your subscribers on Mac devices won’t see a hero image in the notification, your subscribers on Windows and Android devices will.
4. Buttons
Push notifications may be short and sweet, but they leave room for one of the essential elements of a promotion- buttons. By default, users can add two buttons to their push notification. Having these buttons allows you to add a strong CTA (Call-to-Action) to your notification and prompt your subscribers to get onto your store.
According to Wordstream, emails with a single call-to-action increased clicks by 371% and sales by 1617%.
Just like emails, a push notification is supercharged with a CTA and you can quickly tell your visitors what they need to do to grab the enticing offer.
You can use your buttons in a few ways:
1. Use a sharp call-to-action that urges visitors to take action.
Most stores use “Shop now” as their button copy. This crisp CTA creates a higher compulsion within the visitor to take action. You can also use urgency as a way to get your subscribers to click through faster. Take a look at these words that create buyer urgency.
2. Give subscribers more options to choose from.
Use the buttons to direct subscribers to different parts of the store based on their interest or gender. For instance, Mavi Jeans adds “Shop Men” and “Shop Women” as the button copy. This lets subscribers choose the products based on their gender, instead of taking them to a general unfiltered page on the store.

5. Personalization
Ever received a notification that addresses you by name or recommends items based on your past purchases or browsing history?
Push notifications that address the subscriber are always more impactful. According to an Accenture study, a majority of consumers are more likely to buy from a retailer that recognizes them by name, recommends options based on past purchases, or knows their purchase history.
This makes sense. All of us ignore brands that send irrelevant promotions and prefer to shop from stores that show us offers and products that we are more likely to buy. But, how can you ensure that you personalize your push notifications to each of your subscribers?
There are three ways you can give a personal touch to your promotions that aren’t time-consuming:
1. Address your subscriber by name by adding a parameter in your copy.
Want to address your customers by their name in your notification? Use this parameter:
{{customer.first_name | fallback: "WOW"}}
When the notification is sent out, an identified subscriber will receive a notification with their name in the notification copy. If your subscriber is anonymous, they will see the fallback message that is used.

2. Use segmentation to target different kinds of audiences.
Segmentation allows you to send notifications to subscribers based on a particular criterion. You can segment your audience based on their device, their location and even whether they have purchased from you. Read about how you can target different segments of your subscribers with Segmentation.

3. Set up a workflow on Shopify Flow to send triggered push notification.
Besides Segmentation, you can also use Shopify Flow. Flow allows you to set up specific triggered push notifications based on a customer’s activity. For instance, you can send a loyalty discount to a consumer who has purchased from you more than four times. Read about how you can send triggered push notifications using Shopify Flow.

Whenever you craft a new campaign, ensure you run through this quick checklist before you send out the campaign to your subscribers. This checklist will help you perfect your push notification by cleaning up any minor issues before you send the notification to your subscribers.

By keeping these crucial elements in mind, you can ensure that your push notifications receive more impressions and clicks and that your subscribers are eager to click on your notifications.
Here’s to marketing your store with relevant and click-worthy notifications!
Not using web push notifications for your Shopify store? Install PushOwl now to set up the marketing channel and drive more revenue.


.png)